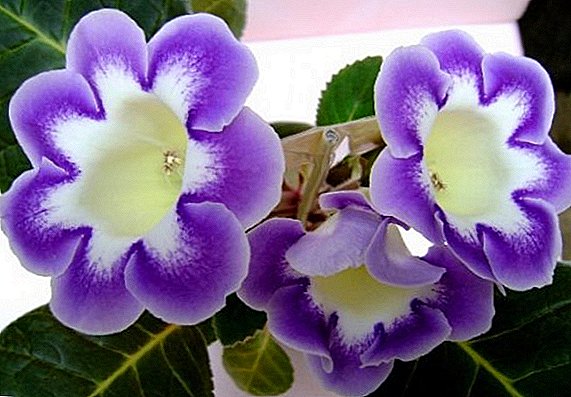
 Gloxinia is loved by many flower growers for lush bouquets of flowers, a huge selection of varieties, easy reproduction and the possibility of breeding. Gloxinia belongs to the Gesneriaceae family, a distinctive feature is the presence of a tuber.
Did you know? The Taiwan Environmental Protection Bureau, Gloxinia, was recognized as the best helper in the fight against oxygen starvation from 20 indoor plants participating in the study.
Optimum conditions of the content of gloxinia in the active flowering period
Lighting and temperature content
 Gloxinia is a very light-loving and heat-loving plant. When growing seedlings, you can additionally use artificial lighting, but an adult plant, so that the socket is compact, and the flowers are large, you need to grow on well-lit window sills or balconies.
Direct sunlight can cause leaf burns, so gloxinia should be shaded on southern and eastern windows. The optimum temperature during the growing season is 18–22 ° C, with tuber germination the temperature up to 25 ° C is needed. When the air temperature is above 28 ° C, overheating of the root system may occur, and the plant will feel bad: the leaves will wilt, the buds will no longer open. Gloxinia leaves can curl, which indicates unfavorable conditions of detention, in this case, you need to either increase the temperature of the air, or make the air more humid, and also need to check the feeding.
Watering and feeding the soil
 Gloxinia has very juicy leaves and large flowers, so the soil dries quickly. It is necessary to water often, but not to allow an overabundance of moisture. In September, when the plant is prepared for the rest period, watering is reduced. If the watering is normal, the plant looks healthy, and for some reason, the buds dry at the Gloxinia, the reason for this is dry air. For good flowering gloxinia need high humidity, so often need to spray around the plants, but that water does not fall on the leaves and flowers. You can also put a pot with gloxinia in a container filled with wet pebbles or expanded clay.
Gloxinia love to feed. During the growing season and flowering, from about April to August, they need to be fed once a week, but in order not to burn the root system, it can be fed more often with a weaker solution and only on moist soil. As a fertilizer for gloxinia, you can use fertilizers for flowering plants that contain more potassium and phosphorus than nitrogen.
Flower care during the winter dormancy
Let's talk about what to do with the gloxinia in the fall. Usually, in the fall, gloxinia leaves dry up - the plant enters the period of winter dormancy, but it happens that they remain green. In any case, in order to preserve gloxinia in winter, all leaves must be removed, a stump of 1-2 cm in height can be left; in the pot with a tuber, it is necessary to carefully remove the top layer of soil so that the tuber is visible. In a pot with a gloxinia tuber, it is necessary to slightly moisten the soil, wrap it in cellophane film and put it in a cool and dimly colored place (somewhere on the floor, under the bed, in a closet or in the bathroom).
 Once every 2-3 weeks it is necessary to open the film and moisten the soil with 1-2 teaspoons of water so that the tuber does not lose moisture and does not wrinkle, but it is impossible to re-moisten to avoid rotting. The only exceptions are plants of the first year of life, in which the tuber is less than 2 cm. Such gloxinia should be left to grow all winter so that they have a tuber that has grown, and they bloom the following year.
Exit the plant from rest
Starting in January, you need to view the tubers for the presence of sprouts. When they appear, you need to get a tuber from the ground and transplant it into a new one. If you missed the moment of tuber sprouting, and the sprout is already stretched, then it is better to cut it off and wait for a new one, otherwise the bush will not be compact. Consider how to transplant gloxinia at home.
Planting and transplanting
 When the tuber wakes up, you need to pull it out of the ground, gently clean and remove all thin and dry roots, rinse with water so that the surface of the tuber is visible, inspect the tuber for the presence of damaged areas and remove them with a knife. Place the cut can sprinkle with charcoal and allow to dry for a day. If the tuber is sluggish, you can hold it for 2-3 days wrapped in a damp cloth or in moist vermiculite, so it can restore elasticity. Before planting, the tubers can be treated with a solution of a fungicide to prevent fungal diseases or the appearance of rot.
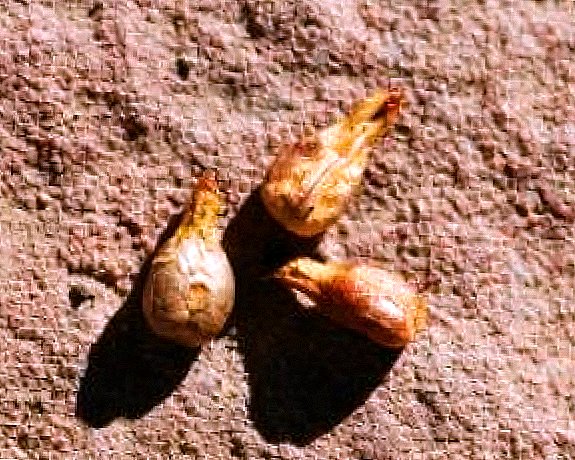
Important! When planting a tuber without sprouts, you need to be careful not to plant it top down. The upper part of the tuber usually has a groove, and the lower one is convex, smoother.
It is necessary to plant a tuber so that its upper part with sprouts and buds is on the surface. As the sprouts grow, the ground should be poured onto the tuber so that it does not spoil. An adult plant must have 1-2 cm of soil over a tuber. During the growing season, another transplant is possible if the plant has faded, and is not going to die off for the winter. Then gloxinia can be cut to the first pair of sheets and transplanted into a new soil. From the buds in the leaf axils, new leaves or shoots will develop.
Watering and humidity
 After planting, a pot of tubers should be covered with a film to maintain moisture. In this case, it is rarely necessary to water the tuber, so that the soil is slightly moist, it is allowed to dry the upper layer. It is necessary to open a film for airing daily. When the sprout forms the first pair of leaves, you can cover the pot only for the night, and after 3-5 days completely remove the film. Novice flower growers are often interested when gloxinia from tuber blooms. When planting tubers gloxinia blooms in 3-4 months.
Soil fertilizer
In order to grow a beautiful gloxinia shrub with strong flowers, the soil for planting a gloxinia tuber must be nutritious, well-fertilized, but not heavy and breathable. Well suited on the basis of peat. For better permeability, sand and vermiculite can be added to the finished commercial substrate. The transplanted tuber is not fed within 1-2 months.
Methods of breeding gloxinia
Gloxinia - very viable plants, therefore, in addition to seeds and dividing the tuber, they multiply vegetatively, with different parts of the plant: cuttings, leaves, and even peduncles.
Planting flowers sheet plate
 For the reproduction of gloxinium leaves, you can use any leaves, but when the leaves are taken for reproduction during the budding period, you can expect gloxinia grown from the leaf to begin to bloom at the beginning of autumn. The stalk for planting is left 2-3 cm long, we deepen it into a light, moist soil and put it in a greenhouse until germs appear. If the sheet is large or has some damage, you can cut the top of the sheet with a sharp knife or blade. Slice sprinkled with charcoal.
A cut off leaf tip can also be planted by cutting it with a cone from the central vein or freeing the central vein, as if forming a petiole. If the variety is very valuable, you can even plant a piece of leaf with vein, because the nodules form on the leaf veins.
When the sprout appears a little older, you need to get a leaf from the soil and separate the tuber with the germ from the leaf. A tuber with a sprout is planted shallowly in the ground. The parent sheet can also be planted again. If the leaf rots, then you need to check the soil, most often it has a formed nodule.
It happens that a leaf is cut in half, a tuber is formed on the top of the central vein - wait until the sprout grows, and separate the tuber with a piece of vein. Plant tubers with sprouts shallowly in the ground, if the tubers are very small, you can simply put them on the ground. Potted tubers are placed in a hothouse until they grow up. If several shoots form on a tuber, then you need to leave the strongest one. The rest carefully cut and plant cuttings.
Planting seeds
 Talk about how to grow gloxinia from seeds. Seeds are sown from November to February. For sowing seeds, you need to take light soil, fill the container to half and moisten moderately. Seeds are best sown in shallow containers.
Gloxinia seeds are very small. For easy sowing, seeds bought in a store can be poured onto a sheet of paper, take a toothpick and, wetted with water, take seeds one by one and put them on the ground. If you want to plant a lot of seeds, then they can be mixed with dry sand and evenly sown on the ground surface. You do not need to cover the seeds with earth, you can sprinkle a little with water. Then the pot is also placed in the greenhouse.
Important! So that the seeds and seedlings do not rot and dry, you need to periodically open the greenhouse for airing and moistening the soil.
When the seedlings will have two pairs of leaves, they need to dive. For transplantation, you can use the same capacity as for planting, but the ground should be different. When nearby plants grow together with leaves, they need to be transplanted again. During the period of growth sprouts dive 3-4 times.
Reproduction gloxinia tubers
 Gloxinia can multiply by dividing the tuber. The tuber is taken big. If kidneys are noticeable on it, then it can be divided without waiting for the sprouts, so that each piece has a kidney. You can wait for sprouts and, having dug a tuber, divide it so that the sprouts are in different parts. Before dividing the tuber can be treated with a solution of fungicide. The division is made with a sharp sterile knife; after the procedure, parts of the tuber can also be treated with fungicide and sprinkled with charcoal. Next, plant in the ground, as well as whole tubers. It is believed that the processing of parts of the tuber during division is not needed. In this case, you need to leave them for a day in the open, so that they are weathered, and then you can land in the usual way.
Important!When processing tubers, care must be taken to ensure that the fungicide solution does not get on the shoots that it can burn.
Planting gloxinia cuttings
If you are left stalk gloxinia without tubers and roots, it can be planted just like a leaf. In this case, the stalk forms a tuber and roots. Grown from gloxinia sprouts can bloom in the same year.
Cultivation gloxinia planting peduncle
 Gloxinia can be propagated even with a peduncle. At the same time, the survival rate is much less than when reproduced by leaves, but it is worth a try. To do this, the flowering peduncle is taken, the stem is cut to a length of 2-3 cm. The peduncle dives into the moistened soil and is placed in the greenhouse. To monitor the emergence of germs should be as in the case of the leaves.
Did you know? Breeders noticed that sprouts growing in one container grow faster than planted separately.
Possible problems in growing gloxinia
Now consider gloxinia diseases and their treatment. Gloxinia can be affected by various types of parasites, so you need to monitor the condition of the plant and process it with the appropriate preparations in time. When temperature drops, excessive watering, dampness can develop fungal diseases, then the stem and leaves become soft, covered with watery spots. In this case, it is necessary to remove all damaged parts of the plant and treat it and the soil with special solutions, such as Fitosporin, Trichodermin.
In gloxinia, tuber can rot, leaves become sluggish and do not recover after watering. Then you need to cut the plant, get the tuber, remove all the damage, process the solution "Maxim" and dry well. Then it can be planted, but watered carefully. Cut vegetative part can be used for reproduction.
Did you know? According to the science of astrobotany, gloxinia with different shades of colors have a different effect on the energy in the house: with white flowers they eliminate bad thoughts, with purple they give an atmosphere of mutual understanding, with blue they fill with inspiration, and with pink and red they make you think about spirituality.


