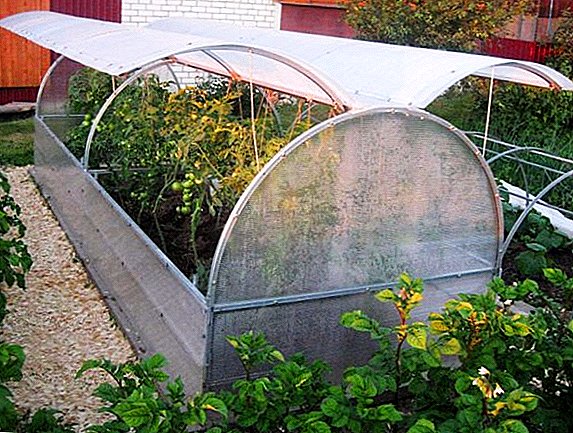
 Every summer resident at least once thought about purchasing a greenhouse or making it. The greenhouse "butterfly" made of polycarbonate is very popular today. In our article we will describe how to assemble this structure independently, consider its advantages and disadvantages.
Description and equipment
The design we are looking at is very much like a butterfly, which is why it got its name. She represents gable construction, which includes the following components:
- board - 4 pieces;
- frame - 2 pieces;
- narrow upper part - 1 pc.
 Typically, the design is made of metal or plastic profile. Polycarbonate is ideal as a coating, in rare cases polyethylene is used.
Did you know? In the manufacture of wooden frame, it is necessary to perform the treatment of the material with an antiseptic, and for long use it is recommended to paint it with oil paint.The open type of the greenhouse resembles a butterfly, which has spread its wings. Frames of a design make both continuous, and section. In the manufacture of the second type of design, you can create inside sections with different climatic conditions. When installing solid frames microclimate throughout the greenhouse will be the same.
Where to place the "butterfly"
An important point when installing is the choice of location. It is recommended to choose a well-lit area. It is best to place the structure from north to south.
It is not recommended to install a “butterfly” in the lowlands, since such an area often causes accumulation of groundwater, rainwater and thawed snow, which will lead to debate and rotting of the plants. Reviews of some truckers indicate that the butterfly greenhouse is terrible, and that it has almost no effect expected. Often this is due to the wrong place, so at this point you should pay special attention.
How to install the structure
If desired, each summer resident can try to assemble the structure himself - there is nothing complicated about it. If you decide to make yourself a butterfly greenhouse, it is very important to familiarize yourself with the assembly instructions.
Site preparation
Before installing the structure, it is recommended to carefully level the area where it will be located.
Did you know? The first, the most primitive greenhouses appeared in ancient Rome. As a shelter used special caps that protect plants from wind and cold.To do this, it should be as close as possible to the level of the horizon. It is also important to take into account technological recommendations and arrange the ends vertically to ensure maximum efficiency in the distribution of snow and wind loads.
Putting the frame
Build a greenhouse "butterfly" consists of several stages, one of the main - frame mounting:
- The first installation of the wings of the greenhouse to its ends.

- In the next step, longitudinal guides are installed. All parts must be fastened with the help of fasteners "father-mother" and start one to another.

- Then, the fixers of the opening position of the greenhouse are mounted.
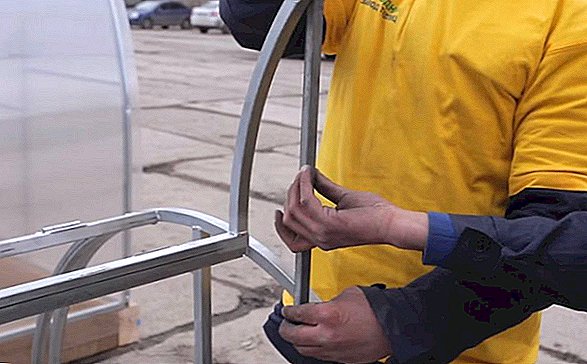
- All connections are fixed with roofing screws.
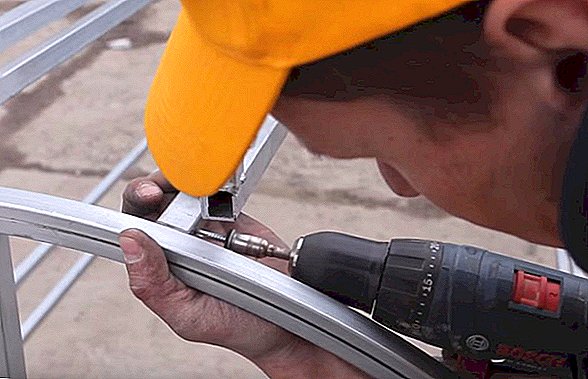
If necessary and desired, you can make a mini-tractor, mower, seedling lighting, arbor, wax refinery, beehive, feed cutter, rabbits feeder, branch chopper, honey extractor, warm beds, wattle fence with your own hands.
Polycarbonate sheathing
After the construction is assembled, you must complete it. trim polycarbonate.
- It is necessary to cut the sheet according to the dimensions that are specified in the instructions, or what you have planned for yourself to create the structure. Honeycombs on polycarbonate when attached to the ends and wings of the greenhouse should be located vertically.
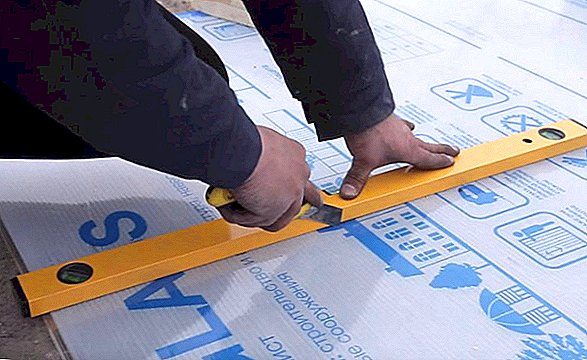
- Then remove the protective shipping film. The side of the polycarbonate on which the film is pasted must be outside the greenhouse.
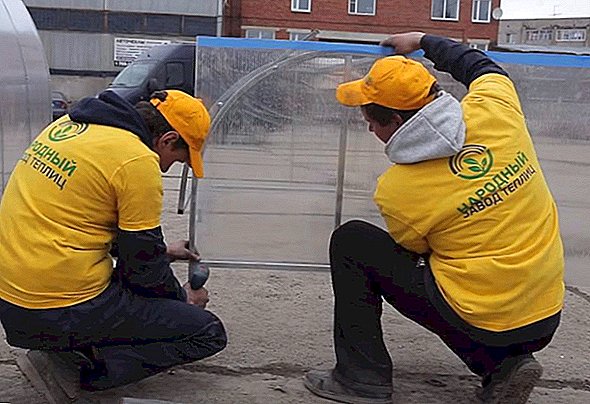
- We carry out fastening of cutting parts intended for the ends of the structure. Carefully trim the polycarbonate outside the design.
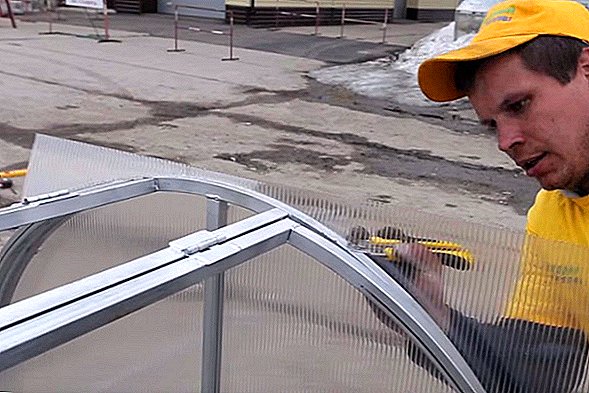
- Then the wing trim is performed. It is necessary to position the polycarbonate in such a way that a visor forms over both ends of the greenhouse. We fix the material with roofing screws. To prevent the formation of waves on the surface, the fixation of polycarbonate is better to start from the extreme upper point of the center of the greenhouse.

- After fixing it is necessary to cut the wings. The side and bottom cuts are made along the profile of the structure in such a way that the wings of the greenhouse rest on the resulting ledge. The recommended indentation from the edge of the profile pipe to the center of the pipe when the incision is 5-6 mm. Upper cuts should be made along the outer edges of the greenhouse wing.
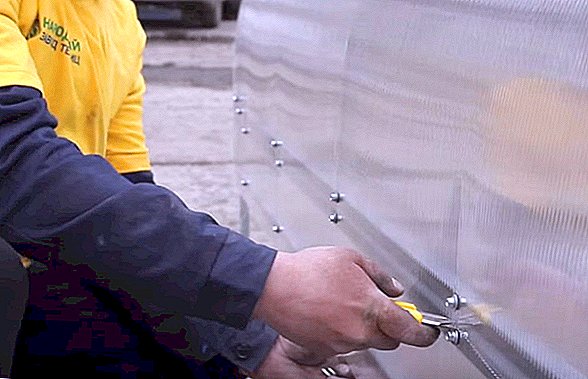
Important! Before preparing the structure for the winter period, it is necessary to wash the polycarbonate, if a film was used - remove it. It is mandatory to disinfect the soil by special means.The greenhouse trim is complete.
Installation pens
The final stage of mounting the design is the installation of handles. To do this, in the upper part of the polycarbonate it is necessary to cut the central part of the hinges to facilitate the opening of the greenhouse.  Handles are mounted on the wings of the greenhouse with self-tapping screws. At this installation of the greenhouse is over, and it can be driven into the ground at the level of the lower longitudinal guide.
Features of operation
In order for you to be able to operate the greenhouse as efficiently as possible, we suggest reading some of the tips:
- When planning the cultivation of several types of plants in the greenhouse, it is necessary to divide it with the help of polyethylene film into special sections.
Did you know? The largest greenhouse in the world - the project "Eden", located in the UK. It was opened in 2001 and its area is 22 thousand square meters. m
- When it's warm outside, you can open the greenhouse and leave it with the lids raised for the day. However, at night or during a cold snap, it should definitely be closed.
- To enhance the sealing and prevent the ingress of cold air inside, you need to use rack frames with film - so you can create a double protection. Thanks to her, you can start planting 2 weeks earlier than usual, and the fruiting period will be increased by 1 month.
- Watering can be carried out as an ordinary garden watering can, and using a drip system.
- It is not recommended that the fruit and scourge touch the floor. Place U-shaped structures near the sides, lay the slats on them (step 7-8 cm). When the seedlings in growth exceed the height of the supports, it is necessary to place the slats under the lash - this will save the plants from damage.
 If you properly operate a greenhouse, follow the tips and recommendations, you can achieve high efficiency.
Advantages and disadvantages
Like any design, a butterfly greenhouse made of polycarbonate has its advantages and disadvantages. The advantages include:
- The ability to efficiently use the area. Thanks to the construction of the greenhouse, it can be approached from different sides, access to plants is not limited.
Important! If your summer cottage is located in a valley, you should definitely make a wooden or concrete foundation for a greenhouse.
- It is convenient to work with seedlings.
- Ability to conduct greenhouse ventilation.
- The ability to install shock absorbers that will control the opening of the door
- Structural strength. The greenhouse will stand even with gusts of wind up to 20 m / s, withstand 10 cm of snow cover.
- Simple assembly.
- High sealing level.
- Affordable cost (self-manufacturing costs are small).
- Long period of operation.
- Easy to maintain.
 As you can see, the design has a large number of advantages, so its construction on the site is very appropriate.
There are few disadvantages in a greenhouse, but still they include the following:
- Bad processing of mounting holes - can be eliminated by yourself with the help of a file.
- Unreliable loops for frames - you can always buy new ones.
- When the greenhouse is covered with polyethylene, material subsidence may occur. The problem is solved using more dense materials.
Did you know? Quite strong and reliable get a greenhouse, assembled from old windows. Such designs protect plants from wind well and create a maximum level of sealing.
Greenhouse "butterfly" - a very convenient design, it can be used for the cultivation of many crops. Thanks to our article, you learned how you can mount the structure yourself, and were convinced of the simplicity of this event.


