Baseboards, both floor and ceiling are quite an important part of the interior. Modern industry offers a wide selection of these decorative elements, which differ in both appearance and material of manufacture. The characteristics of various types of plinths and the features of their installation will acquaint the material.
Measurement
To determine the amount of materials needed, you need to take some measurements. First, the perimeter of the room is determined by summing the lengths of all the walls. This will give the total length of the ceiling plinths.
To determine the length of the floor, from the perimeter values subtract the width of the doorways. If there is a detailed apartment plan, then you can not take measurements, and calculate everything using the data plan.
For example, there is a room with one doorway and a perimeter of 20 meters. This is the length of the ceiling elements. From this value we subtract the width of the opening, equal to 0.9 m, and we get 19.1 m - this is the length of the floor elements. The standard length of the ceiling plinth - 2 m, floor - 2.5 m.
Therefore, you need 10 ceiling and 8 floor elements of the specified length. But errors are possible during installation, there will be losses when cutting corners. Therefore, it should be added to the calculated values of another 10%.  Thus, it turns out that 11 elements are needed for the ceiling, and 9 elements are rounded for the floor. In addition, you will need corner elements, fasteners or glue.
Did you know? The first plinths began to make in the I century BC. er on the territory of the Roman Empire. These were thin planks of precious wood. Often, this decorative detail of the master was decorated with a complex ornament that harmoniously connected the wall and floor, which gave the overall interior a finished look.
Selection and purchase of materials and accessories
There is a wide choice of various types of baseboards. Sometimes when buying it is important not only to determine their appearance, but also to know the properties of a particular type of decorative element, to understand its advantages and disadvantages. Let's try to understand this issue.
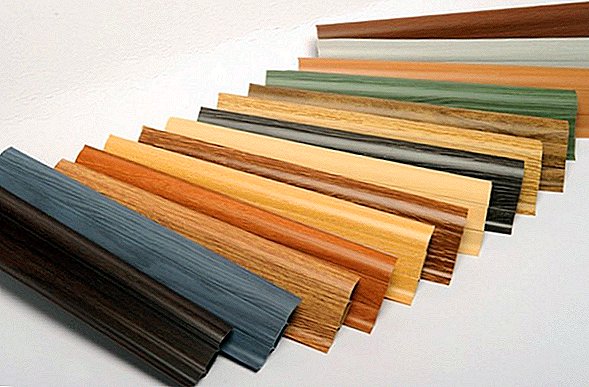
Wood
This type of plinth is classic. At present, wooden elements are often status, made of expensive wood. They can be both floor and ceiling.  There are two types of them:
- the base is made of an inexpensive array, which is covered with veneer of valuable species from above;
- the whole element is an array made of the same wood species.
We advise you to read about how to put the socket and the switch, how to remove paint from the walls, whitewash from the ceiling, how to glue the wallpaper, how to make a plasterboard partition with a doorway, and also how to sheathe the walls with plasterboard.
The advantages of such a plinth include a beautiful appearance and texture, as well as environmental friendliness. The disadvantages are the high cost, the tendency to warp from exposure to moisture, the complexity of installation.
Plastic and polymer
In this category on the market are skirting of several materials. They all have their own characteristics, namely:
- PVC skirting board may be floor and ceiling. Of the advantages, it is possible to note an affordable price, ease of installation (special fasteners are included in the kit), flexibility, durability, resistance to external conditions (moisture, fungus, etc.), ease of maintenance.
 The disadvantages include the absence of wide elements and exposure to heat, which causes deformation and makes it undesirable to use a plinth of this material over the kitchen stove or in the area of powerful light sources;
 The disadvantages include the absence of wide elements and exposure to heat, which causes deformation and makes it undesirable to use a plinth of this material over the kitchen stove or in the area of powerful light sources;
- polyurethane baseboard it is used both in floor, and in ceiling options. The high flexibility of the material allows it to be used to decorate rooms with a complex configuration (niches, arches, rounding). In addition, it is durable, durable, resistant to moisture and temperature extremes, environmentally friendly, easy to maintain. The disadvantage is its relatively large weight, which complicates the installation of ceiling elements;

- polystyrene elements (polystyrene foam) suitable only for joints between the wall and ceiling, for the floor they are too fragile. Products from this material are inexpensive, lightweight, resistant to deformation and fungi, can be painted. The disadvantages include fragility, the ability to crumble during processing. Extruded polystyrene has greater strength and less crumbling, but also costs a little more.

Ceramic
Skirting ceramic can only be outdoor. It has a rather narrow range of application - it fits perfectly to rooms with a floor covered with ceramic tiles. Of the benefits can be noted durability, strength, ease of care, the absolute resistance to moisture. The downside is the fragility and the relative complexity of installation. 
You will probably be interested to read about how to install blinds on plastic windows, water heater, shower cabin, instantaneous water heater and air conditioning system.
MDF, MDF plinths
The plinth made of MDF (it is DVP of average density) happens both ceiling, and floor. Products from this material are inexpensive, resistant to moisture, do not fade under sunlight. But at the same time they are fragile, scratches and other mechanical damages quickly appear on them. 
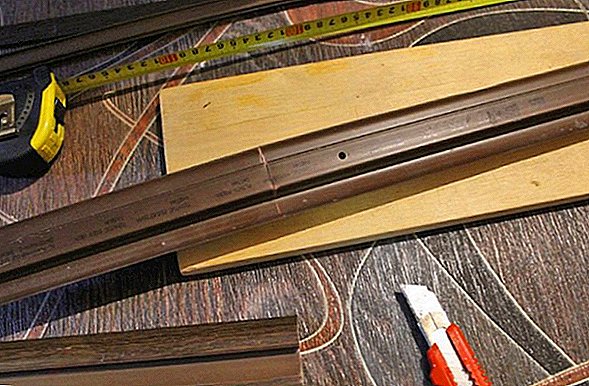
Required Tools
During the installation process you will need the following tools:
- measuring tape;
- pencil for tags;
- miter box - a device for cutting elements at the desired angle;
- hacksaw or knife, depending on the material of the elements for cutting;
- spatula to remove excess glue, if the profiles are installed on the glue;
- drill for drilling holes - as needed, depends on the installation option;
- screwdriver - the same thing.
Marking
Usually the installation of profiles start from the inside corners. To dock the mating profiles, they are cut with the help of the can at an angle of 45 °. To join the profiles on the outer corners, make the markup. The profile is applied to the place of its installation, a line is drawn across the floor beyond the corner with a pencil.  Then apply the profile to the mating wall, the point of its intersection with the line and will be the cut-off point. In addition, preliminary marking is necessary if profiles are being installed on the brackets. In this case, fixing brackets are marked on the wall.
Installation of floor plinths
Depending on the material of the plinth, there are several ways to install it. In particular, it is installed on the bracket, on the glue and on the screws. Let us examine these methods in more detail.
On staples
The advantage of this method of installation is the absence of traces of fasteners on the outer surface of the plinth. The profile itself is easily installed on the brackets and can be easily dismantled.  Installation is performed according to the following algorithm:
- Do markup for mounting fasteners. The first mark is usually set at 5 cm from the corner, the frequency of the subsequent marks depends on how smooth the wall is. If the walls are even, the marks are placed less often, 50 cm apart, otherwise the step can be reduced to 20-30 cm.
- In the marked areas of the wall, drill holes and install plastic dowels.
- Install the fasteners and fix them with screws in the dowels.
- Install the plinth on fasteners, pre-fitting elements along the length.
- Special angular elements are installed at the corners, and in the area of the doors - caps.
Important! The distance from the angle to the first fastener should not exceed 10 cm, otherwise the mount will not be very reliable.Video: installation of floor plinth on brackets
On glue
Glue mounting is the fastest way. This method is suitable if the walls, floor or ceiling are well aligned, otherwise the profile may lag behind.
The glue used is liquid nails (acrylic or neoprene), acrylic putty (it helps to smooth unevenness), special adhesives for polyurethane, universal polymer glue. Such brands of glue as "Titan", "Dragon", "88", "Moment Installation" are widely used.
Installation using adhesives takes place according to the following algorithm:
- The plinth is tried on to the installation site, using markings and a hacksaw, trimmed in length and form joints.
- If necessary, glue is prepared (some types need to be diluted with water).
- You can glue profiles directly on the wallpaper, but for reliability it is preferable to glue on the prepared wall. To do this, the wall is cleaned of dirt, you can degrease it.
- Glue is applied to the surface according to the instructions for use. For example, liquid nails are applied to the point, and with a putty you can even out irregularities and cover the gaps.
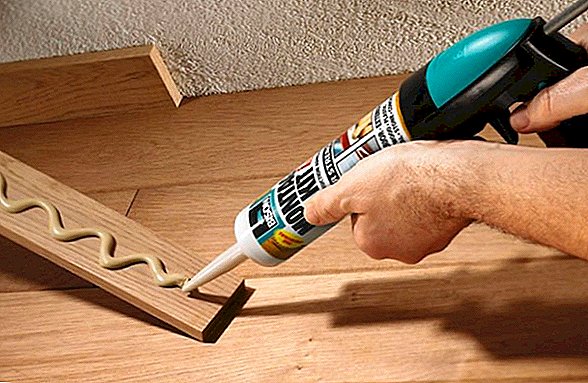
- The plinth is applied to the wall and held in this position until the glue grabs.

- If glue drips out, remove them immediately with a spatula.


Important! Work with neoprene liquid nails requires good ventilation. The sharp smell that remains after installation disappears after a few days.
On screws
Usually on self-tapping screws establish wooden or plastic plinths. This method is time consuming, requires certain skills and careful execution. But using this method, you can mount profiles even on relatively uneven walls.
This type of installation is performed as follows:
- Profiles can be adjusted in length and for joints in advance; this can be done during installation.
- Through holes are drilled in profiles for screws, with a step of 40-50 cm.
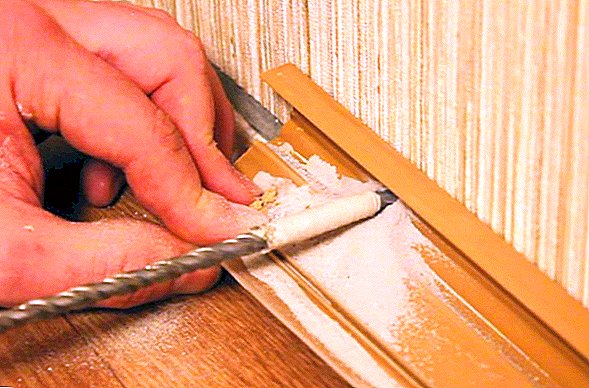
- The holes are machined with a larger diameter drill bit to form conical grooves, which make it possible to hide the caps of the screws.
- The plinth is applied to the installation site. Through the drilled holes mark places for dowels in pencil
 .
. - Drill holes in the marked places, insert dowels.

- Again, attach the profile and fix it with screws.
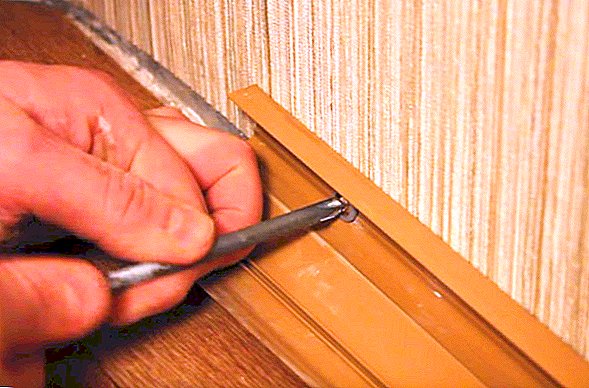
- The caps of the screws are covered with caps.


 .
.

Features mounting the baseboard
There are varieties of plinth, differing not in the material of manufacture, but in construction. These include warm profiles, ceiling and profiles with cable channel. Their installation has its own characteristics.
Warm
The warm plinth, it is the plinth heater, is a heating system. As heating elements are used copper heating elements, hidden in an aluminum box. There is another variant of the system, when instead of heating elements is used a liquid heated from an autonomous boiler or central heating.
It will be useful for you to read about how to properly sheathe the door and insulate the window frame.Such systems heat the walls, which evenly give off heat to the room. They are characterized by low heat loss, with their help creating a healthy microclimate in the room. Systems do not affect wooden interior elements.
The system can be mounted on any surface: wood, drywall, concrete, brick. Profiles should be located 1 cm from the floor and 1.5 cm from the wall.  Such a distance is provided by fasteners, which are fixed with screws in plastic dowels. The pitch of the fastener elements is 40 cm. A heat-insulating tape is attached between the wall and the housing during installation.
A maximum of 17 electrical system modules can be installed. Modules are installed in series, their grounding is ensured. The system is connected to the power source through a temperature controller, which is installed at a distance of at least 1.5 meters from the floor, and there must be free space around this device.
The pipes of the fluid system are connected to the heating sections by a threaded fitting with a rubber gasket. After starting the water, the system is inspected for leaks. If there are no leaks, it is covered with front panels.
Video: installation of electric warm plinth
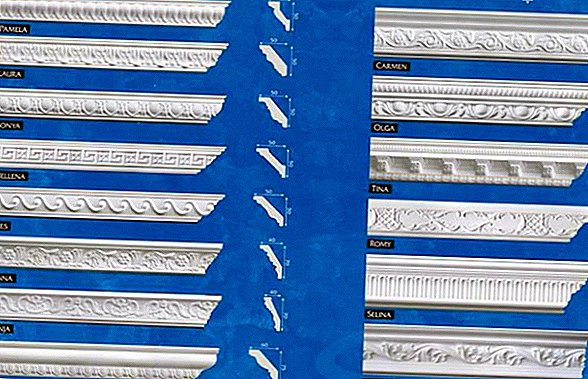
Ceiling
As the ceiling use plinths made of wood, plastic, polymers, gypsum. All types of profiles are attached to suspended and plastered ceilings. For suspended ceilings use lightweight elements, usually of foam.
They are installed depending on the material, most often on glue, but heavy wooden elements can also be mounted on screws - the installation methods are described in detail above. Gypsum plinth is currently not used, its installation is usually done by experts.
With cable channel
The use of such plinth allows you to hide the wires inside the profile. These systems are of two types: with a central location of the cable channel and top removable cable channel.  The installation of the profile is made on the fastener elements, it is described in detail in the subclause “On the brackets”. Laying the wires in the cable channel is carried out during installation. The joints and corners are covered with special elements, if they do not hold well, they can be fixed with a transparent sealant.
Features in work
When installing the plinth, you should follow certain rules, the implementation of which will save time and allow you to achieve a beautiful appearance of this interior element.
Did you know? After the invention in the XYI century machine for the production of sawn veneer, the production of baseboards has entered a new qualitative stage. The masters began to put thin plates of valuable wood on simple tree species, so even inexpensive products looked very respectable. Also at this time in France, the production of mosaic veneer spread, and the plinth was sometimes turned into a work of art.
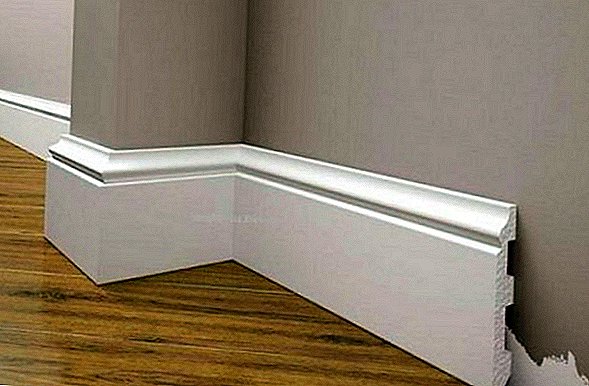
How to mount and install in the corners
Installation of profiles is recommended to start from the inside corners on the longest sections of the walls.  The first point of the fastener should be located at a distance of no more than 10 cm from the corner. The principles of marking skirting both on the inner and outer corners are described above in the subsection "Marking".
The joints of plastic profiles are usually masked with corners or plugs, they are often additionally fixed with a transparent silicone sealant for reliability. Due to the fact that plasterers often make the corners of rooms slightly rounded, these corners have to be grinded by a grinder to fit them tightly. In addition, the gaps that occur when joining profiles can be masked with a putty.
We recommend to read about how to build a gable, chetyrehskatnuyu and mansard roof, as well as how to roof the roof with ondulin or metal tile.
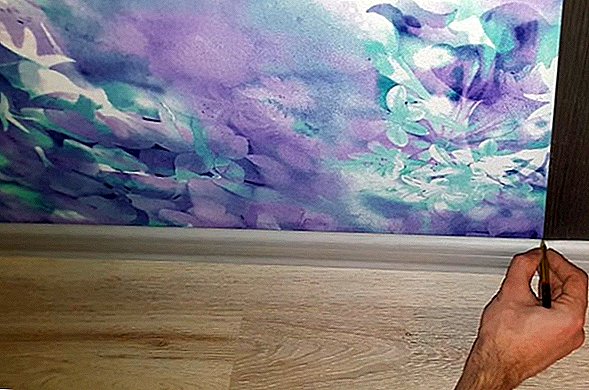
How to trim the plinth
For cutting use a stationery knife, a construction knife or a hacksaw - it depends on the material of the plinth. The use of a device, called the miter box, allows you to cut the profile at a certain fixed angle of 45 °, 60 ° or 90 °.
Professional block allows you to cut the profile at any desired angle. For corner joints, trim elements start from the outside.  It is allowed to modify the file of cut fragments, if, of course, the material allows for such a modification. If there is no experience in the layout of the plinth, it is recommended that you first practice on small fragments of the profile.
Common mistakes
Installation of the plinth is often not without errors. The most common are the following:
- profile fasteners are designed in such a way that gaps are observed between the profile and the floor (or ceiling);
- corners, masking corner joints, are not polished, therefore they do not fit tightly to the wall;
- glue drips from under the baseboard were not removed in time;
- the plinth with the cable channel is mounted without parallel conducting of cables;
- corner joints trimmed at the wrong angle.
 So, installation of a plinth is not so simple as it may seem at first glance. There are a number of nuances characteristic of working with profiles of different designs and from different materials. However, subject to these features, the installation of this decorative element is quite within the power of and not a specialist.