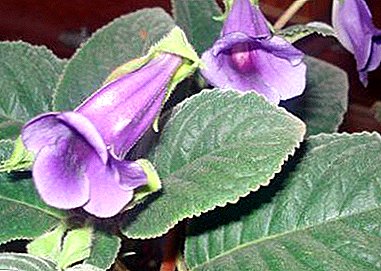
Gloxinia beauty has long been a favorite among experienced flower growers and home lovers. This plant, with proper care, is not whimsical and is able to please its families for a long time with flowering.
Few people know that gloxinia can be easily propagated at home to fill the whole house with a riot of colors. Having studied the simple rules of reproduction and rooting of a plant, everyone can create an entire greenhouse at home with his own hands.
In our article we will consider in detail all the ways to propagate this beauty. You can also watch a useful video on this topic.
When breeds?
The breeding period of gloxinia for different ways will be different:
- planting seeds is best from November to February;
- if you plant Gloxinia by dividing tubers, then the best period for this is from February to May;
- if propagated by grafting, the branch with young leaves should be planted somewhere in March.
Preparation for the process
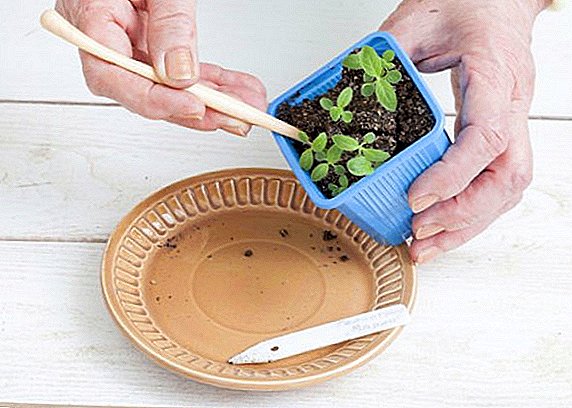
The most time-consuming in the preparation of indoor flower for reproduction is the collection of seeds. Gloxinia seeds appear by artificial pollination. On the second day after the bud blooms, you need to transfer the pollen to the flower with a small brush. Seeds ripen in boxes for 2 months.
How to propagate the plant?
How to propagate the plant? This can be done in 5 ways, which are described below.
Cuttings
 Multiply gloxinia cuttings easiest. Leaf cuttings take root very well and quickly give new roots.
Procedure:
- in an adult healthy plant, a leaf with a small scape is cut in 1-1.5 centimeters;
- rooting petiole in a mixture of peat and sand in a ratio of 1: 1;
- cover this planting with glass or film to create a greenhouse effect;
- 1 time per day seedlings need to be aired.
After 3 weeks, young tubers are formed, then the plant can be fully opened and transplanted to a permanent place of growth.
Watch the video about gloxinia grafting:
Tubers
For reproduction in this way, only a healthy tuber from an adult plant is taken.. Procedure:
- large tuber must be cleaned of residues of the soil;
- use a sharp knife to divide the tuber into parts, so that each part contains a separate shoot;
- cut areas need to be dried with wood ash;
- Each received piece of root must be planted in a separate pot, like a full-fledged tuber.
Important: The first 3 days do not water this plant.
Instructions for planting gloxinia with a tuber and seeds can be found in a separate article.
We recommend to watch the video on breeding gloxinia by dividing the tuber:
Peduncle
The peduncle is an escape of a plant without leaves on which a flower is located. This method of breeding gloxinia is considered the most difficult, because the flower spike may not take root for a very long time or keep it out.
Procedure:
- cut off the peduncle with a stem about 3-5 centimeters;
- place the appendix in a container with water so that it plunges into the liquid 1.5-2 centimeters, it will be necessary to add water periodically;
- wait for the appearance of young roots on the peduncle;
- To land a young sprout in the ground at a depth of 2-3 centimeters.
Sheet of paper
Procedure:
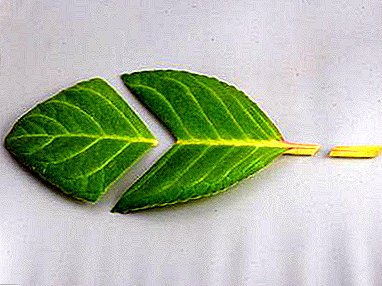 cut the sheet at the very base of the socket;
- cut the sheet plate from the back across the protruding veins in thickened places;
- put the sheet on the moistened soil and press the cuts to the soil;
- create a greenhouse effect with film or glass.
 cut the sheet at the very base of the socket;
In places of cuts, roots form over time, and then small tubers will formand. They can be planted in separate containers, as full-grown adult tubers.
There is also a rooting method for leaf cutting:
- in June-July take one leaf from the bottom of the plant;
- place the stem in a container with water so that it plunges into the liquid 1.5-2 centimeters, it will be necessary to add water periodically;
- maintain a leaf in water until young roots form on the cuttings;
- To land a young sprout in the ground at a depth of 2-3 centimeters.
More information about the reproduction of Gloxinia leaf described here.
We recommend to watch the video on the breeding of gloxinia leaves:
Seeds
Seed planting order:
- From November to February, seeds should be sown in a mixture of leafy earth, peat and sand in a ratio of 1: 1: 1;
- seeds are not deepened, but only slightly sprinkled with earth;
- put the seed container in a bright and warm place, periodically spray the soil with warm water from the sprayer;
- To create a greenhouse effect, cover crops with a film and periodically air.
Sprouts appear in 14-20 days. Young plants with 2-3 leaves can already be transplanted into a separate permanent pot.
We recommend to watch a video about breeding Gloxinia seeds:
How to root at home?
To root Gloxinia, with any method of plant reproduction, you need to wait for the appearance of roots or tubers. Next, the plant is planted in the soil composition:
- 2 parts leafy soil;
- 1 part peat or greenhouse earth;
- 1 part of river sand.
 Gloxinia soil should be of weak acidity and breathable. To do this, it must be well plowed. Also, it is imperative to carry out soil disinfection. For this, a solution of the special agent Maxim will be suitable, for 1 liter of water 1 ampoule of the drug.
Before planting on the bottom of the pot must be placed good drainage.. A gloxinia pot should be chosen shallow, but wide. Since the root system of the plant is superficial and does not require deep penetration.
In order for the plant to take root faster in a new place, its root part can be treated with special means to accelerate the formation of roots (tubers):
- Kornevin.
- Immune cell.
- Humisol.
- Zircon.
Possible difficulties
Even if during the reproduction of gloxinia in any of the possible ways to do everything as correctly and gradually as possible, there may still be difficulties in the further growth and development of young plants.
Consider the most common problems of breeding gloxinia:
- rooting rooted leaf stalk;
- the divisible leaf dries up;
- leaf petiole releases roots, but does not form tubers;
- rotting of the root and above-ground parts of the plant due to deep penetration into the soil;
- drying of small tubers.
Flower care during cultivation
There are a number of rules for the care of the gloxinia after reproduction for its further comfortable development.
Temperature conditions
This indicator may vary under different conditions:
- at the stage of germination of young shoots, the temperature should be at least + 25 ° C;
- after the rooting of gloxinia, the temperature should vary in the range from + 18 ° C to + 22 ° C.
Air humidity
 Gloxinia feels good with air humidity of 50%, not lower. If it is not possible to organize such conditions, then the permissible limits of this indicator are 70-80%.
To increase the humidity indicators, you should place the plant pot on the tray:
- with wet clay;
- with water;
- with moss
Do not spray the ground part of the plant, as gloxinia becomes sick, brown dry spots will appear on the leaves and it will die.
Watering
For irrigation, it is recommended to use only soft water (rain, thawed, boiled, filtered, distilled). Gloxinia is best watered from the pan or on the edge of the pot, so as not to fall on the ground part of the plant.
Board: If watering a flower from a pallet is necessary to drain water from it in 15-20 minutes in order to avoid over-saturation with water of an earthy coma. Water for irrigation should be at room temperature or slightly warmer, but not colder.
Top dressing
The first 2 months after planting young plants do not need to fertilize them. After 60 days it is necessary to feed Gloxinia 1 time in 10 days. If this is not done, then the plant can stop developing in the state of dormant vegetative buds.
We recommend to watch the video about gloxinia feeding:
Conclusion
It cannot be said that all the breeding methods of gloxinia are easy to perform, but if you follow the points of simple instructions, then the process of breeding many of these indoor flowers is not so time consuming.
You should not wait for the rooting of all young sprouts at once, but also you should not despair, soon everything will turn out. And with proper care of the plant, there will be no problems at all, and you will be able to breed a whole botanical garden of Gloxinia beauties at home.